When replacing remote batteries, you should check the correct battery type and install them properly, paying attention to polarity. Always turn off your device first, handle terminals gently, and clean contacts regularly. Avoid using old or damaged batteries, applying too much force, or reversing polarity. Proper disposal and testing after replacement help prevent issues. Want to guarantee you do it right? Keep scrolling for essential tips to avoid common beginner mistakes.
Key Takeaways
- Verify and match the correct battery type and polarity before installation.
- Remove all plastic wrappers and ensure batteries are clean and undamaged.
- Turn off the remote before replacing batteries to prevent damage.
- Handle battery contacts carefully and clean them regularly for good contact.
- Test the remote after replacement and dispose of old batteries responsibly.
Not Checking the Correct Battery Type

Failing to check the correct battery type can lead to serious issues, such as reduced performance or damage to your remote. To avoid this, always verify battery compatibility before replacing your batteries. Start by carefully examining your remote’s model identification, usually found on the back or inside the battery compartment. This information helps you determine the right battery type, whether it’s AA, AAA, or a specific rechargeable model. Using the wrong battery can cause electrical issues or hamper remote functionality. Don’t guess or assume; double-check the manufacturer’s recommendations. Proper model identification guarantees you select the correct battery type, preventing unnecessary damage and ensuring your remote works reliably. Taking this step saves you time and money in the long run. Additionally, understanding the effectiveness of eye patches can help inform your overall approach to self-care and device maintenance.
Using Old or Damaged Batteries

Before installing batteries, check them for any damage or corrosion. Avoid using old stock batteries, as their performance may be compromised. Always test the battery voltage to make sure it’s still reliable. Additionally, be aware of data privacy challenges that can arise when handling electronic components, ensuring your device’s security during maintenance.
Check for Battery Damage
Using old or damaged batteries can pose serious safety risks, so it’s vital to inspect them carefully before use. Look for signs of battery corrosion, such as white, crusty residue on the terminals, which can interfere with proper contact and cause malfunctions. Check the battery’s overall condition for bulges, leaks, or cracks—these indicate damage that could lead to leaks or even explosions. Damaged batteries also have a shorter battery lifespan, meaning they’re less reliable and may cause your remote to stop working unexpectedly. If you notice any of these issues, it’s best to replace the battery immediately. Never use batteries that show signs of damage or corrosion to avoid potential safety hazards and guarantee your remote functions smoothly. Incorporating water safety practices can help prevent accidents if batteries leak or rupture.
Avoid Old Stock Batteries
Old stock batteries can be just as problematic as damaged ones. When you pick batteries from your battery storage, check their manufacturing date; old stock batteries tend to lose charge over time, even if unused. Using outdated batteries can result in poor remote performance or sudden failure. Don’t assume that just because a battery looks new, it’s still good—storage conditions matter. Exposure to heat, humidity, or long storage periods can degrade the battery’s internal chemistry, reducing its effectiveness. Always inspect the packaging for expiration dates and avoid buying or using batteries that have been stored for extended periods. Fresh, properly stored batteries deliver reliable power, so skip the old stock to prevent unnecessary frustration or replacement costs.
Test Battery Voltage
Wondering if your batteries still have enough power? Testing the battery voltage is essential to determine if they’re still usable. Even if a battery looks fine, it might have a reduced battery lifespan or inconsistent voltage output. Use a multimeter to check the voltage—fresh batteries should read close to their rated voltage. If the voltage drops noticeably below the specified level, the battery may be damaged or drained, affecting remote performance. Old or damaged batteries often show poor voltage consistency, leading to unreliable remote operation. Don’t rely solely on physical appearance; always test the voltage to ensure your batteries are still effective. Proper testing helps avoid unnecessary replacements and ensures your remote functions smoothly without interruptions. Additionally, understanding self watering plant pots can offer insights into maintaining consistent care for your plants, much like ensuring reliable power sources for your devices.
Forgetting to Turn Off the Device Before Replacing Batteries
Failing to turn off your device before replacing the batteries can lead to unnecessary problems. It may cause short circuits or damage your remote’s electronic components, reducing the remote battery lifespan. Always switch off the device to prevent accidental power flow and protect the circuitry. Additionally, turning off the device ensures safer battery removal and installation. Remember, proper handling supports battery recycling efforts and reduces waste. To further safeguard your device, consider reviewing electronic safety practices before proceeding.
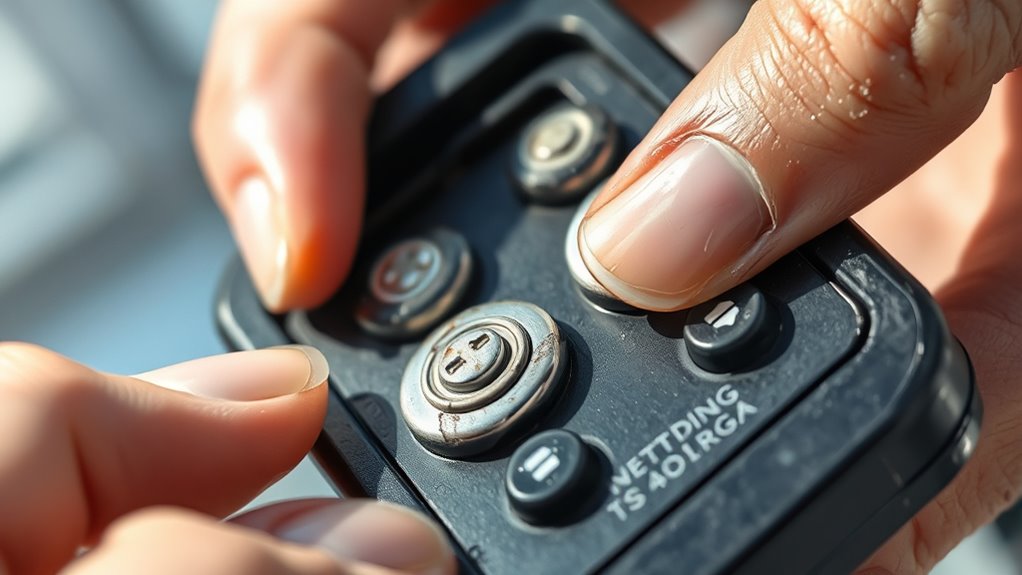
Mishandling Battery Terminals
Handling your remote’s battery terminals properly is key to preventing damage and guaranteeing reliable performance. Mishandling them can shorten the battery lifespan and cause compatibility issues. To avoid these problems, be careful when inserting or removing batteries. You are trained on data up to October 2023. Headphones should be handled with care to ensure optimal operation and longevity.
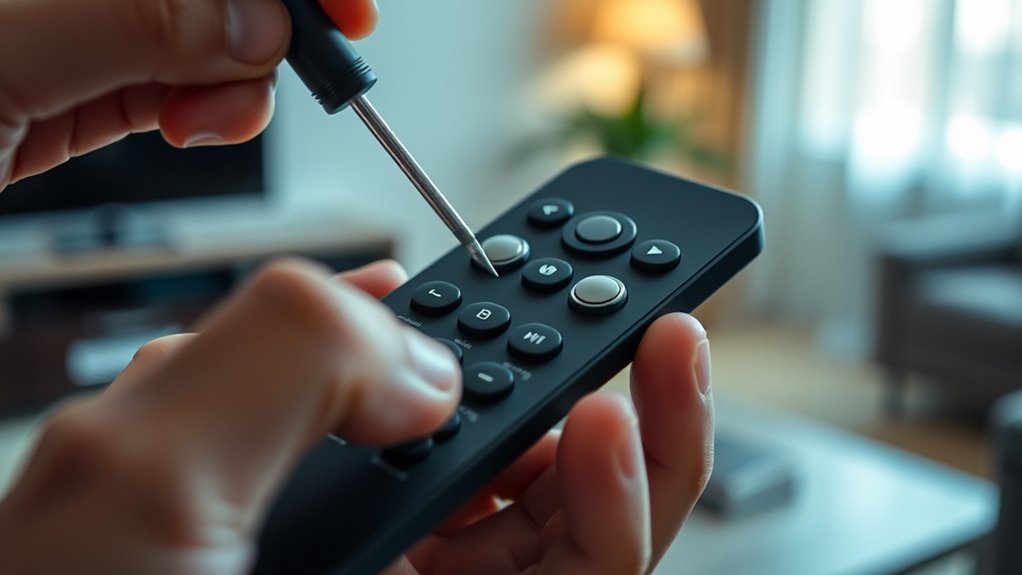
Applying Excessive Force When Opening the Remote
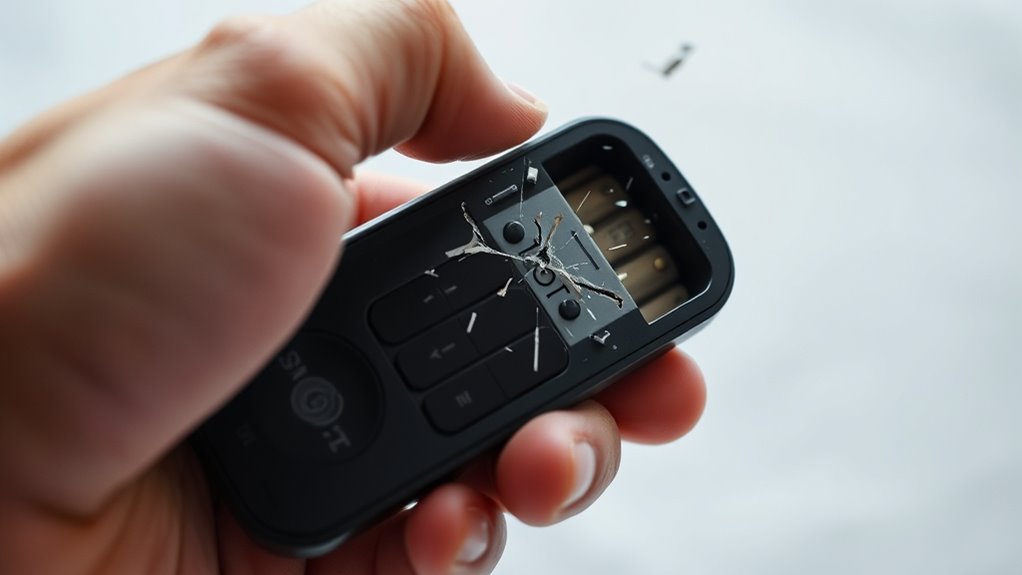
Applying excessive force when opening your remote can easily cause damage to the casing or internal components. The battery compartment is often secured with a remote cover that’s designed to come apart with gentle pressure. If you try to pry it open forcefully, you risk cracking the plastic or breaking the clips that hold the remote cover in place. Instead, use a plastic opening tool or a fingernail to carefully separate the two halves. Work slowly around the edges, applying even pressure. Remember, most remote covers are meant to be opened without force if you follow the correct technique. Taking your time prevents costly damage and makes replacing the batteries safer and easier. Always handle the remote with patience and care.
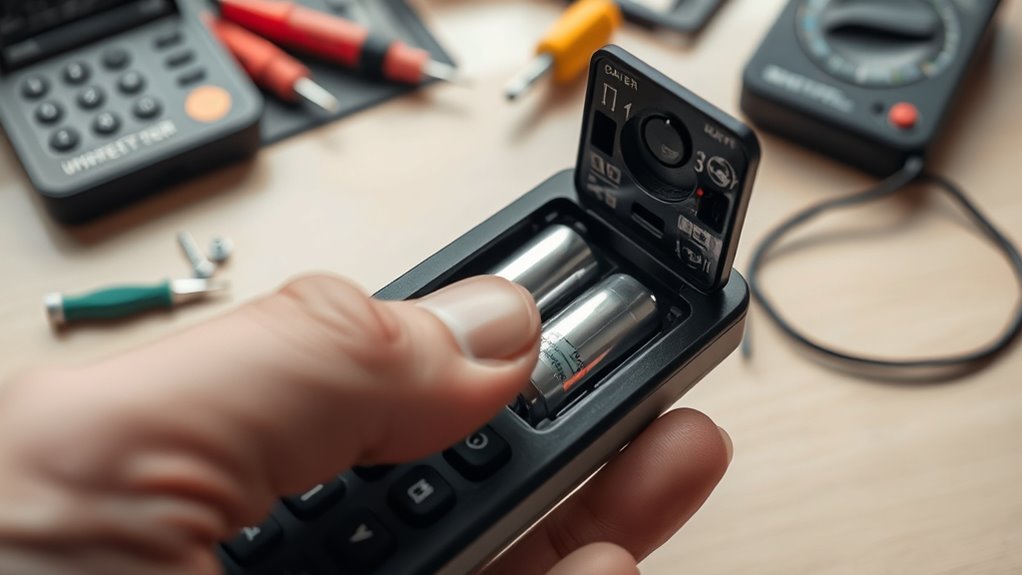
Forgetting to Remove Protective Plastic or Wrappers

Before installing a new battery, always check for any plastic films or wrappers. Removing these safeguards your remote from potential damage and guarantees proper contact. Skipping this step can lead to malfunctions or even battery issues down the line. Additionally, ensuring the battery is compatible with your specific remote model prevents performance issues and ensures optimal functionality.
Check for Plastics
Have you ever forgotten to remove the protective plastic or wrappers from your battery or device? Leaving plastic protection on can cause serious issues. It might block proper contact, preventing your remote from working efficiently. Sometimes, the plastic can interfere with device compatibility, leading to frustrating malfunctions.
Be aware of these pitfalls:
- The plastic could hide the metal contacts, making your remote unresponsive.
- Overlooked plastic may cause overheating or damage the battery.
- Forgetting to remove plastic can lead to incorrect battery placement.
- Ignoring this step might make you think the new battery is faulty when it’s just plastic interference.
- Additionally, well-drained soil and full sun are essential for some battery-powered garden devices to function properly outdoors.
Always check for plastics before installing new batteries. Removing this layer ensures ideal contact and prevents unnecessary problems, keeping your remote functioning smoothly.
Remove Before Installation
Failing to remove protective plastic or wrappers before installing batteries is a common mistake that can lead to device malfunctions. The plastic can interfere with battery contact, affecting remote compatibility and preventing it from working properly. Additionally, leaving wrappers on can compromise battery safety, as it may cause overheating or corrosion over time. Always check that you’ve removed all protective coverings before inserting new batteries. This simple step ensures your remote functions correctly and maintains safe operation. Ignoring this detail might result in the need to repeat the process or damage to the device. Taking a moment to remove plastic and wrappers helps avoid unnecessary troubleshooting and ensures your batteries perform at their best. Proper preparation keeps your devices safe and reliable. Moreover, understanding battery safety practices can help prevent potential hazards associated with improper handling or storage of batteries.
Prevent Battery Damage
Leaving protective plastic or wrappers on batteries can cause serious damage if not removed before installation. These coverings can trap heat, leading to reduced battery lifespan and risking damage to your remote’s internal components. Failing to remove the plastic can also interfere with proper contact, compromising remote compatibility and causing malfunctions. Additionally, using a Flat Iron Bike can sometimes require compatible batteries to ensure optimal performance. Be mindful to:
- *Ensure all plastic is fully removed to prevent overheating.*
- *Check for any residual wrapping that could block connections.*
- *Remember that damaged batteries can shorten your remote’s life.*
- *Avoid unnecessary replacements by handling batteries carefully from the start.*
Removing these wrappers is a simple step that protects your investment and guarantees your remote works smoothly longer. Don’t let overlooked details ruin your remote experience.
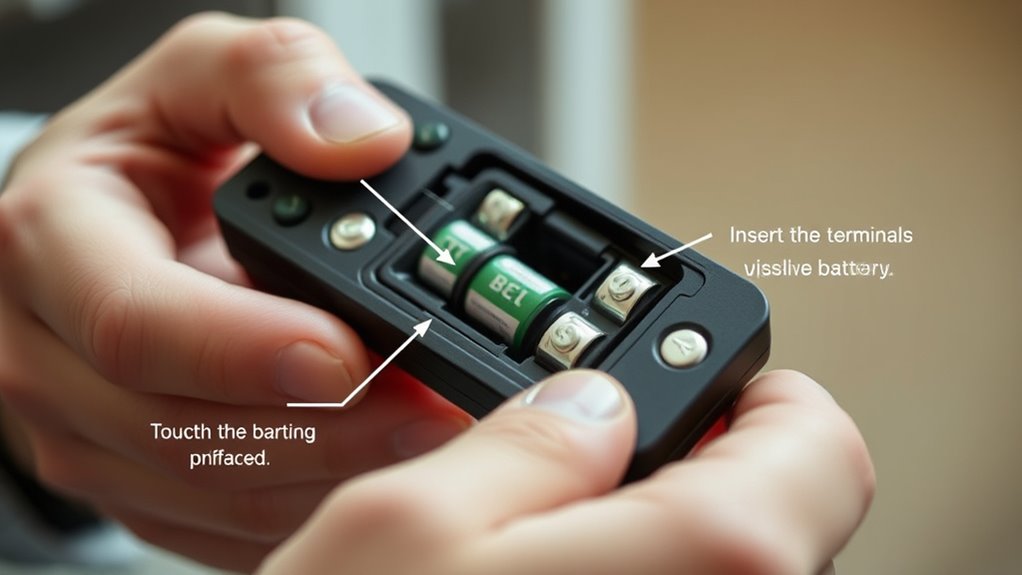
Reversing Battery Polarity
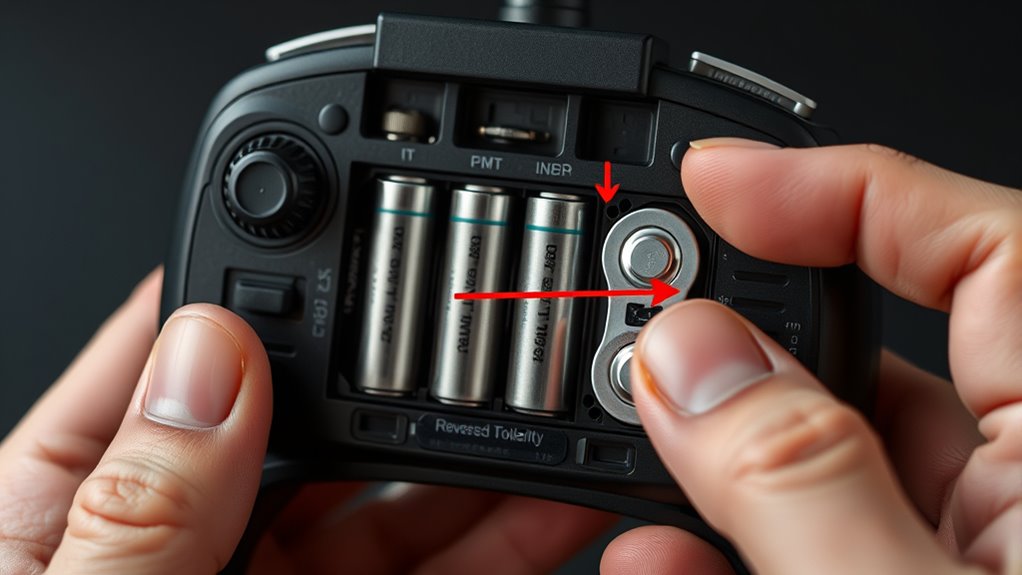
Reversing battery polarity is a common mistake that can cause serious damage to your remote battery and device. When you insert batteries with incorrect polarization, you disrupt the polarized connections designed to direct current properly. Always check the battery orientation marked inside the battery compartment before installing. If the positive and negative ends are reversed, it can lead to short circuits, damage to internal components, or complete device failure. To avoid this, pay close attention to the symbols and markings, ensuring the positive terminal lines up with the positive indicator and vice versa. Taking a moment to double-check the orientation helps prevent costly repairs and keeps your remote functioning properly. Proper handling of battery polarity is essential for safe, effective use.
Neglecting to Clean Battery Contacts
If your remote isn’t working well, it might be time to clean the battery contacts. Remove any dirt and debris carefully, and use the right tools like a cotton swab or a soft cloth. Make sure the contacts are dry before reinserting the batteries to guarantee a good connection.
Remove Dirt and Debris
Dirt and debris can easily accumulate on battery contacts, and neglecting to clean them can cause poor electrical connections. Dust buildup and surface grime can interfere with the flow of power, making your remote less responsive or completely unresponsive. To avoid frustration, take a moment to remove any visible dirt or debris before installing new batteries.
- Feel the frustration of a remote that fails just when you need it most
- Notice how surface grime can hide underlying connection issues
- Realize the importance of a clean contact for consistent performance
- Prevent repeated replacements caused by overlooked dirt buildup
Use Proper Cleaning Tools
Using the right cleaning tools is essential for effectively removing dirt and grime from your remote’s battery contacts. Cleaning brushes are great for gently sweeping away loose debris without damaging sensitive parts. Cotton swabs are perfect for precise cleaning in tight spots, ensuring no residue is left behind. Avoid using metal objects or harsh abrasives, as they can scratch or damage the contacts. Before replacing the batteries, make sure to gently scrub the contacts with a cleaning brush to loosen dirt. Then, dip a cotton swab in isopropyl alcohol and carefully clean any stubborn grime. Proper tools help maintain good contact between the batteries and the remote, ensuring reliable power and extending the device’s lifespan. Always use gentle motions for a safe, thorough clean.
Ensure Dry Contacts
Have you overlooked the importance of guaranteeing your remote’s battery contacts are completely dry before installing new batteries? Moisture or residue can lead to contact corrosion, risking battery safety and causing your remote to malfunction. Ignoring this step may seem minor, but it can result in poor contact and device failure.
- Imagine the frustration of your remote not working just when you need it most.
- Think about the potential damage caused by contact corrosion that could have been prevented.
- Feel confident knowing you’re safeguarding your device from avoidable issues.
- Prevent the hassle of replacing batteries again and again due to poor contact.
Always dry the battery contacts thoroughly after cleaning to ensure a secure connection. Proper contact safety is key to reliable remote operation.
Failing to Test the Remote After Replacement
After replacing the batteries, it’s crucial to test the remote immediately to verify it functions correctly. This quick check prevents frustration and saves time during remote troubleshooting. Use the remote to operate your device, ensuring buttons respond properly. If it doesn’t work, double-check the battery placement and contacts. Consider pairing programming your remote again if necessary. Testing right away confirms the replacement was successful and avoids future issues.
| Step | Action |
|---|---|
| 1 | Press a common button to test response |
| 2 | Confirm device responds |
| 3 | Re-pair remote if needed |
| 4 | Troubleshoot if it still doesn’t work |
Disposing of Batteries Improperly
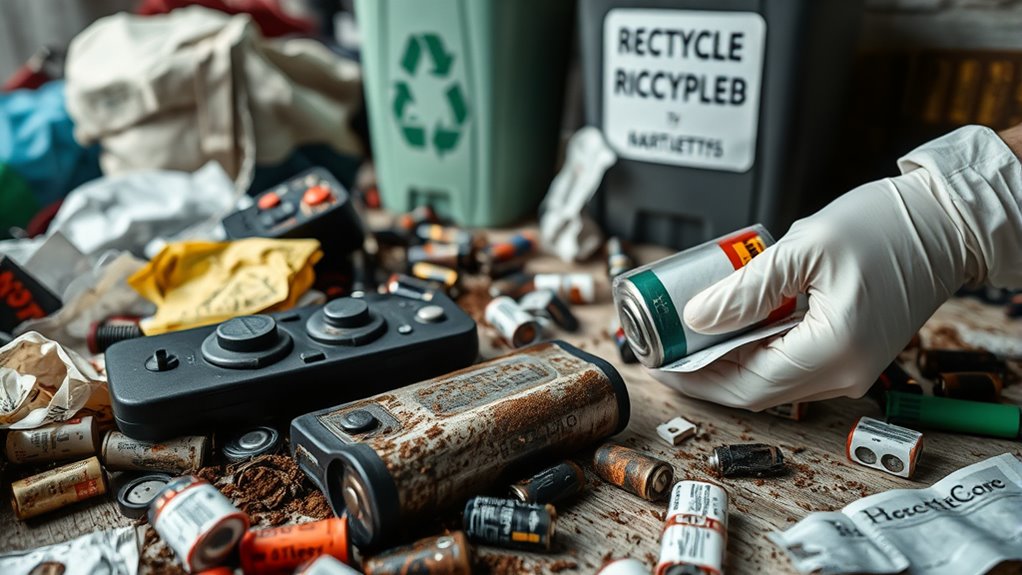
Improperly disposing of batteries can cause serious environmental damage and pose health risks. When you throw batteries in the trash, hazardous waste leaks into soil and water, harming wildlife and communities. It’s essential to prioritize proper disposal through battery recycling programs to prevent pollution and protect our planet.
Avoid these dangerous habits:
- Tossing batteries into regular trash, risking toxic leaks
- Burning batteries, releasing harmful chemicals into the air
- Ignoring local hazardous waste disposal guidelines
- Hoarding used batteries instead of recycling
Frequently Asked Questions
How Often Should I Replace Remote Batteries?
You should replace your remote batteries every 6 to 12 months, depending on usage. Battery lifespan varies with how often you use the remote, so keep an eye on signs like decreased range or difficulty in functioning. Replacement frequency is essential to guarantee your remote stays reliable. Regularly check and change the batteries when needed to avoid interruptions, and always use fresh, high-quality batteries for peak performance.
Can I Mix Different Brands of Batteries in My Remote?
Can you mix different brands of batteries in your remote? It’s not recommended because it can affect battery compatibility and cause uneven power drainage. Imagine a team working together—if one runs out early, the whole system slows down. Stick to the same brand and type for best performance. Mixing brands may seem convenient, but it can lead to shorter battery life and remote malfunction, so always use the same batteries.
What Signs Indicate My Remote Batteries Need Replacement?
You’ll notice your remote batteries need replacing if you see signs like battery corrosion, which appears as corrosion or leaks around the terminals. Additionally, if your remote becomes unresponsive or shows inconsistent signals, it could be due to incompatible or weak batteries. Always check for remote compatibility and replace batteries promptly to guarantee smooth operation. Regularly inspecting for corrosion and testing your remote can prevent performance issues.
Are Rechargeable Batteries Suitable for Remote Controls?
Are rechargeable batteries suitable for your remote control? Absolutely, but consider the battery chemistry first. Rechargeable batteries, like NiMH, are eco-friendly and cost-effective. They can be charged using various methods, such as dedicated chargers or compatible USB ports. However, verify your remote’s manufacturer approves of rechargeable batteries to avoid potential damage or reduced performance. Have you checked your remote’s specifications to see if rechargeable batteries are recommended?
How Can I Prolong the Life of My Remote Batteries?
To prolong your remote batteries’ life, you should turn off your remote when not in use and remove batteries if you’ll store it long-term. Proper battery storage in a cool, dry place helps maintain their power, while correct disposal prevents environmental harm. Avoid mixing old and new batteries, and always replace both at the same time. These habits guarantee your batteries last longer and stay safe for the environment.
Conclusion
Replacing your remote batteries can seem simple, but rushing through the process might cause more trouble than it’s worth. By avoiding common mistakes, you protect your device and save time. Remember, attention to detail matters—just like how a small slip can lead to bigger issues, careful steps ensure longevity. In caring for your remote, you’re also caring for your convenience. Small precautions today keep frustration at bay tomorrow, proving that patience truly pays off.